 This tutorial will help you set up a Blogger blog. Actually, you won't be needing this tutorial as Blogger is pretty simple, and very easy to understand. Creating a blog on Blogger would be a breeze even for newbies.
Anyway, we're here to guide you just in case you guys mess up.
As previously mentioned in our last post (see Introduction to Blogger), Blogger has been acquired by Google in 2003. With this acquisition, Google has integrated Blogger into its network, thus, making it accessible to users with a Google Account.
To get a Blogger blog, go to www.blogger.com, and click on the "Create a Blog" button. You may have to create a Google account first. However, if you already have a Google or a Gmail account, then you don't need to register. Simply sign in using your existing Google or Gmail account and password.
Creating a Google Account
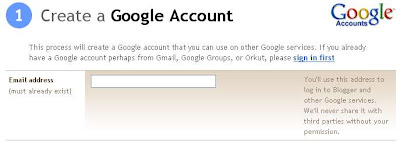
This is how the sign up form looks like, simply follow the instructions to successfully create a Google account.

Email Address: Enter your email address on the blank (ie. myemail.yahoo.com). Remember, it must be an existing email ad. Providing a fake email ad will give you complications later.

Retype email address: Enter the same email address. It must match the email ad you provided above, otherwise, an error in signup may occur.

Enter a password: Enter a password that only you alone knows. Do not enter an easy to guess password. The meter below shows how strong your password is.
Note that the characters you enter will appear as * in the field. Just keep entering a password. It is displayed like this to conceal its value, but it's actually the character you entered.
Make sure to memorize your password also or you won't be able to access your own account.
Retype password: Enter the password you entered above. It must be a match.

Email Notifications: When you check this, you will be receiving emails about announcements, advice, and other information from Blogger.

Word Verification: Enter the same exact words you see in the image above. It is case sensitive, meaning, if you see the text in capital, make sure to enter the letter in capital also. This feature makes sure that the one registering is human and not a bot.

Acceptance of Terms: Finally, read the Terms of Service, then check the "I accept the Terms of Service" box. Hit the continue arrow afterwards.
If you don't agree to the TOS, then you won't be able to use the service.
Note: If there are errors in the form, you will not be able to proceed to the next page. The field that have errors in them will be emphasized by red texts instructions.
Naming your Blog
Now that you have created a Google Account, it's time to name your blog..

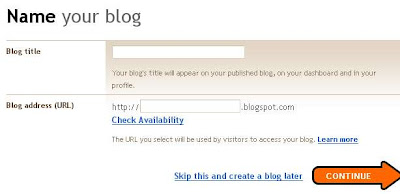
Blog title: Blog Title is the name that your blog will be using. Any character is accepted.
Blog address (URL): This will be the url address your blog will be using. For example, you entered my-biz-online. Therefore, your blog address will be http://my-biz-online.blogspot.com. This is the url address used to view your blog.
Note that your blog's URL must be unique. Click on "Check Availability" to determine if the blog url you entered is still available. If it's used by another user, then you won't be able to get that url. If it's available, then hit Continue.
Choosing a Template
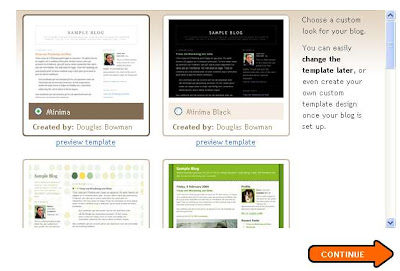
This is the final step of creating a blog. A template is your blog's design or skin. This is how your blog will look like.

Blogger has already provided you a set of templates to choose from. Just browse the page to look for a template of your desire. You need to click on it to choose it or you may preview the template by clicking on the "preview template" link. Once you have chosen a template, simply hit continue.
That's it, your blog is all set, you may now start blogging.
See us again for another part on this tutorial.


No comments:
Post a Comment
You are allowed to post a signature on your comment, just please don't spam.